The following protocol is for producing electro-competent cells of agro-bacterium. Currently A. tumefaciens agropine-type strain EHA-105 (Hood et al.,1995) is used for transformation of sunflower and arabidopsis. Harvesting new competent cells takes 4 days to complete with the 4th day being the most labour intensive. It’s advised to begin early in the morning on the 4th day as the length of culture, purifying, and aliquoting can take several hours.
Materials
Glassware/Plastics
- 2x 1L flasks
- 4x rotor bottles (plastic)
- 1x 50-100 mL baffle flask
- 250 mL & 100 mL graduated cylinders
Biological
- Glycerol stock of EHA-105
Antibiotics & Liquid Media
- Rifampicin Stock (50 mg mL-1)
- Dissolve 50mg of rifampicin in 800 µL DMSO (Sigma-Aldrich CAS# D8418)
- Bring up to final volume of 1 mL
- Filter-sterilize using a 1 mL syringe and a DMSO compatible 0.2 µm syringe filter (VWR catalog number 28144-050: Acrodisc Syringe Filter DMSO-safe)
- Store at -20C for up to 6 months
- YEB Broth (1.5L)
- 1 L distilled water
- 1% w/v Yeast Extract (Sigma-Aldrich CAS# 8013-01-2)
- 1% w/v Bacto-peptone (BD Bionutrients CAS# 211677 )
- 0.5% w/v NaCL (Sigma-Aldrich CAS# 7647-14-5)
- Adjust pH to 7.0 using 1.21N HCL/ 1N NaOH
- Bring final volume of 1.5 L with distilled water
- Dispense 500 mL into 1 L flasks (2x) and a 1 L bottle – autoclave minimum 35 minutes on a liquid cycle.
- YEB Agar (50 mL)
- 40 mL distilled water
- 1% w/v Yeast Extract (Sigma-Aldrich CAS# 8013-01-2)
- 1% w/v Bacto-peptone (BD Bionutrients CAS# 211677 )
- 0.5% w/v NaCL (Sigma-Aldrich CAS# 7647-14-5)
- Adjust pH to 7.0 using 0.121 N HCL/ 0.1N NaOH
- Bring final volume of 50 mL with distilled water or MILI-Q
- Dispense 50 mL into 100 mL bottle and add 1% w/v Agar (Sigma-Aldrich CAS# A1296)
- Autoclave minimum 20 minutes on a liquid cycle.
- Cool in a water bath until 50 ℃, add 50 µL of filter-sterilized Rifampicin 50 mg mL-1 (in DMSO) swirl to mix evenly and distribute into petri dishes (10-15 mL each).
- Leave for 15-20 minutes to solidify
- Use immediately or store upside down in the plastic sleeve at 4 ℃ for up to 1 month.
- 10% v/v glycerol (Sigma-Aldrich CAS# G5516) (500mL)
Expendables
- 2 L distilled water
- 5 petri dishes
- PCR single tubes or .5mL tubes (~100)
- Parafilm
- Aluminum Foil
- Autoclave indicator tape
- P1000 Pipette + Tips
- Serological Pipets (10mL)
Misc
- Temperature controlled shaker/incubator (Located in the Tissue Culture Lab)
- 1L flask adapters
- 50-100 mL flask adapter
- Culture Spreader or Bacterial Loop
- ETOH Lamp
- Refrigerated Centrifuge with A-10 Rotor (Located in the Main Lab)
- Spectronic 20 (Located in the Tissue Culture Lab)
Procedure
- Day 1- Tissue Culture Lab
- Pre-culture
- Streak out a bacterial loop full of agro-bacteria using a dilution streak onto a Rifampicin (50 µg/mL) YEB agar plate.
- Incubate at 28℃ for two days
- Pre-culture
- Day 2 -Tissue Culture Lab
- Make up 1L YEB Broth and 50mL for 2-3 YEB Agar plates
- Make up 500 mL 10% v/v glycerol
- Autoclave;
- 2 L of distilled water (DI)
- 500 mL 10% v/v glycerol
- 4 rotor bottles and caps
- YEB broth in 1 L flasks (2x) + 1 L bottle minimum 35 minutes on a liquid cycle.
- YEB agar
- PCR single tubes or 0.5 mL tubes (~100)
- 50-100 mL baffle flask
- 250 mL & 100 mL graduated cylinders
- Day 3- Main Lab/ Tissue Culture
- Place in 4℃ fridge of Main Lab
- Autoclaved distilled water
- 10% v/v glycerol
- A-10 rotor without inserts
- Autoclaved Rotor Bottles
- Starter culture- Tissue Culture Lab
- Select a single colony and place in 50-100 ml baffle flask containing 10 mL of YEB broth w/o antibiotics pre-warmed to 28℃
- Shake at 200rpm 28℃ overnight
- Place in 4℃ fridge of Main Lab
- Day 4 -Main Lab/Tissue Culture Lab
- At this point turn on the centrifuge and set to 4℃ without the rotor.
- In the Tissue Culture Lab:
- Inoculate each 1 L flask containing 500 mL of YEB broth pre-warmed to 28℃ with 5 mL of the starter culture
- Shake at 200rpm 28℃
- Measure OD600 hourly using the Spectronic 20 until the OD600 is above 0.2
- Measure every 30 minutes until the OD600 is above 0.3
- Measure every 15 minutes until the OD600 reaches 0.4.
- At this point transfer the flasks to ice for 30 minutes gently swirling every 5 minutes.
- From here on the cells much be kept chilled to retain high viability.
- Transport culture flasks on ice to the Main Lab.
- Washing the cell culture:
- Load the chilled A-10 rotor into pre-chilled centrifuge and set to 1000g.
- Bring the flasks to a freshly sterilized flow-hood running for minimum 15 minutes prior to use.
- Wipe down every surface in the hood and newly introduced object with 70% ETOH prior to introducing to the flow-hood.
- Add ~250 mL of culture to each rotor bottle.
- Weigh the sealed rotor bottles on the general scale and adjust the liquid between bottles to a tolerance of + 0.1g in the hood.
- Pellet cells at 1000g for 20 minutes at 4℃.
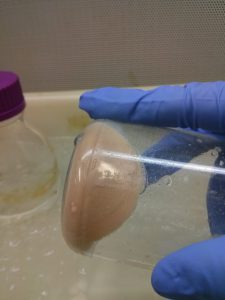
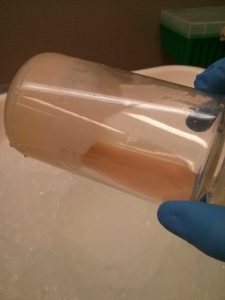
- Gently decant the supernatant and aspirate the remain liquid being careful to not disturb the pellet.
- The first spin will be a fairly compact pellet but it will continue to become loosely aggregated as more washing steps are introduced. If it is disturbed, add enough DI to balance the bottles and spin for 10 mins to re-solidify the pellet.
- Use a serological pipette to reduce the volume to about 3-5 mL above the pellet.
- A P1000 pipette can be useful for collecting remaining few mLs.

- Add 100 mL of chilled DI to each bottle and gently swirl to resuspend the cells evenly.
- Combine two bottles together leaving a total of 2 rotor bottles containing ~200 mL of suspended cells in DI.
- Pellet cells again with above conditions.
- Discard the supernatant and aspirate the remaining liquid.
- Add 50 mL 10% v/v glycerol to each bottle and gently resuspend.

- Pellet cells again with above conditions.
- Decant the supernatant and aspirate the remaining liquid.
- Resuspend each pellet in 1 mL of 10% v/v glycerol.
- Make a 1 mL 1:100 dilution of cell suspension and measure the OD600.
- Adjust the cell suspension to 1.0 OD600 with 10% v/v glycerol.
- Test for Arching
- Take a 50 µL aliquot and place into a .1 cm cuvette ensuring there is no air bubbles (can cause arching).
- Turn on the BioRad Gene Pulser Xcell Electroporation unit (BioRad, California, USA).
- Go to user programs -> Allan -> EHA-105
- Place the cuvette into the green pod making sure the contacts are clean and correctly aligned.
- Pulse the cells
- If the cells do not arch and a smooth decay curve is generated on the machine output screen, proceed to aliquot storage.
- If the cells arch attempt once more. If they continue to arch resuspend in an additional ~50mL of 10% glycerol and preform another wash procedure and dilution before pulsing again.
- Aliquot Storage
- Add 50 µL of cell suspension to each PCR or 0.5mL tube
- It saves a great deal of time to pour the suspension into a sterile well and use a multi-channel pipette.
- Snap freeze the tubes of fresh cells in a bath of liquid nitrogen and store at -80℃ for up to 1 year.
- To use the cells, let them thaw for 10-15 minutes on ice prior to electroporation.
